Step 1: Setting Up Your Airtable Database for Emailing
Before we get into automation, let’s make sure your Airtable is set up properly. If you’re using Airtable as a CRM, project management tool, or client tracker, you probably already have a table with contact details. If not, it’s time to create one.
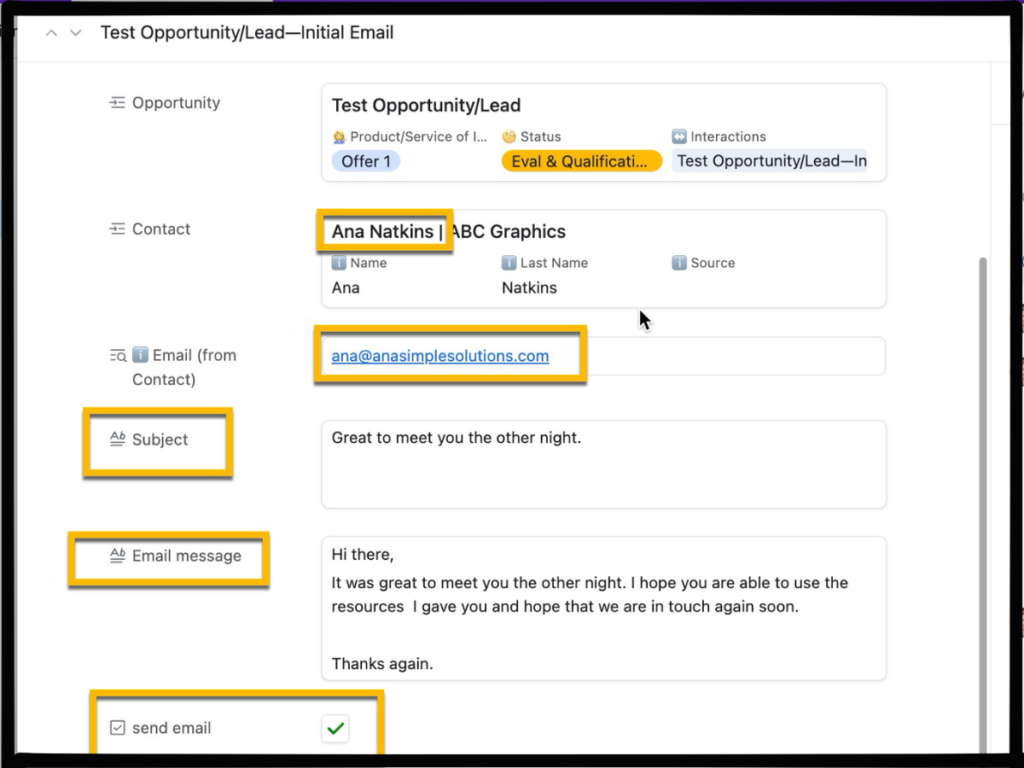
At the very least, you’ll need fields for:
- First Name & Last Name – To personalize your emails
- Email Address – Since, you know… we need to send an email
- Interaction Type – A dropdown for calls, emails, meetings, etc.
- Email Subject & Message – The actual content of your email
- Send Email Checkbox – This is what will trigger the automation
Once you’ve got these fields ready, you’re all set to move on to automation.
🖼️ A screenshot of an Airtable database with these fields labeled.
Step 2: Creating an Airtable Automation to Send Emails
This is where the magic happens. Airtable’s no-code automation feature makes it easy to send emails without needing an external tool (though we’ll be linking Gmail in the next step).
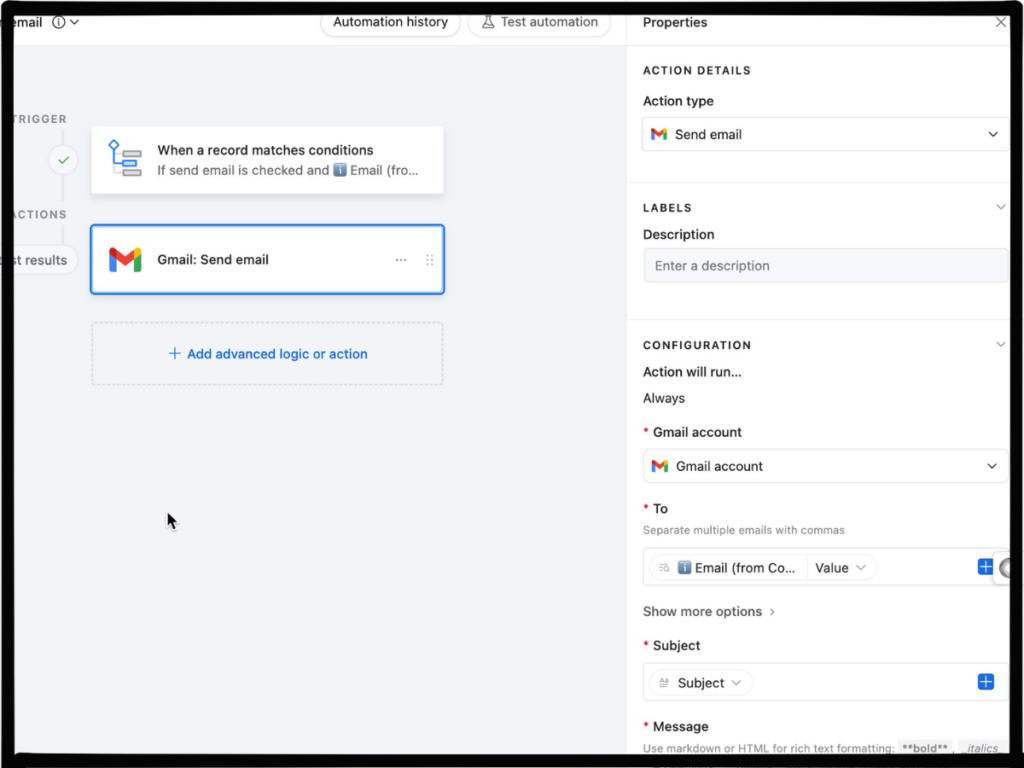
To create your automation, go to Automations in Airtable and set up a new trigger. You’ll want to choose “When a Record Matches Conditions” and tell Airtable to fire the automation only when the Send Email checkbox is checked and the Email field is not empty.
This setup ensures that an email only goes out when you actually want it to—no accidental blank emails being sent into the void!
If you’re someone who tends to forget small details (hello, ADHD brain!), automations like this are a lifesaver. They take repetitive tasks off your plate, so you can focus on the big-picture work that actually grows your business.
🖼️ A screenshot of the Airtable automation trigger settings.
Step 3: Connecting Airtable to Gmail for Email Sending
Now that the trigger is set, Airtable needs to know what to do when that checkbox is checked. This is where we integrate Gmail.
When setting up the action, choose “Send an Email” and connect your Gmail account. Once connected, you’ll map the fields like this:
- To: Select the email address field from Airtable
- Subject: Use the email subject field from Airtable
- Body: Insert the email message field (and add a signature if you like)
At this point, you have an automation that sends an email with the click of a checkbox—no more copy-pasting or losing focus while switching between apps.
For ADHD entrepreneurs, this kind of workflow reduces overwhelm and makes client communication so much easier. Instead of overthinking, forgetting, or procrastinating, you just check a box and move on to your next task.
🖼️ A screenshot of the Airtable Automation configuration
Step 4: Testing & Activating Your Email Automation
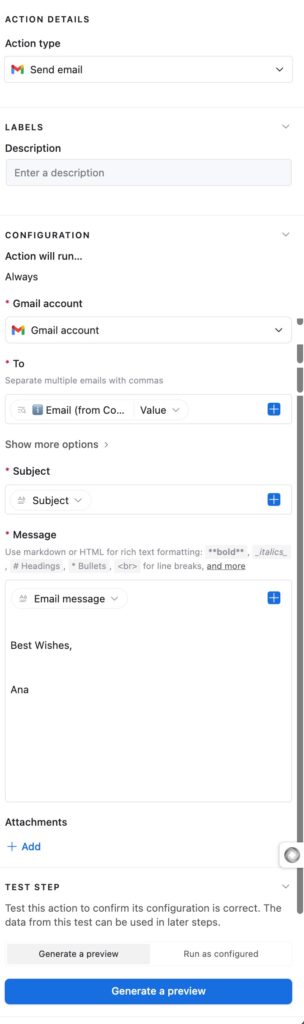
Before you go live, you’ll want to test the automation to make sure everything is working properly. Airtable allows you to run a test to see what the email would look like before actually sending it.
If everything looks good, turn on the automation. Now, whenever you check the “Send Email” box, Airtable will instantly send an email—no extra steps needed.
This is where automation can be a game-changer for ADHD business owners. Instead of spending mental energy remembering who to follow up with, when to send an email, or where you saved that last conversation, Airtable does it for you.
🖼️ Example of a test email sent from Airtable.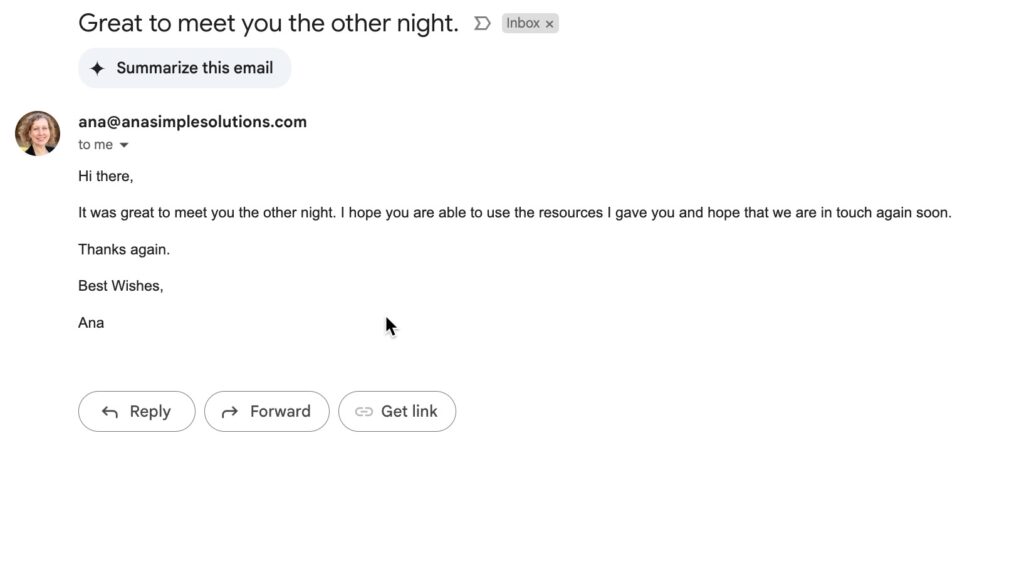
Bonus: How to Track Email Replies in Airtable
Sending emails is great, but what if you want to track who replies? Since Airtable doesn’t have built-in email tracking, you can use Zapier or Make (formerly Integromat) to log incoming responses in Airtable.
For example, you can create a Zapier automation that:
- Detects an incoming email in Gmail
- Finds the matching record in Airtable
- Logs the response in an “Interactions” table
That way, you can see who replied and what they said—without leaving Airtable. If you tend to lose track of conversations, this setup ensures nothing gets forgotten.
Do you want a video on how to use Zapier to gather email replies from specific leads? Let me know! [email protected]
Final Thoughts: Automate Your ADHD Business and Stay Productive
If you struggle with follow-through, context switching, or remembering to send emails, this Airtable automation is an absolute lifesaver. By automating repetitive tasks, you free up mental space for creative work, big-picture thinking, and actually growing your business.
Want More ADHD-Friendly Productivity Tips?
More Productivity & Airtable Tutorials:
📃 Favorite Tools for digital organization with ADHD [HERE]
📃 Airtable for ADHD [HERE]
🎥 Airtable views for beginners [HERE]
Looking to learn more?
Check out these blogs:
Simple Task and Project Management 👈
Planning your Week and Calendar Scheduling 👈
How to focus on the right things 👈